Ion 2.x or Ion 3.0
Ion gives you the ability to specify custom registry settings for a given profile. These settings apply only to that specific profile, and do not affect the default browser, other Ion profiles nor the base Windows operating system. This allows you to customize the application environment without fear of affecting other websites or applications.
This article assumes you are already familiar with the basics of working with Ion, including creating profiles and rules.
Browsium allows you to customize any registry key in the Windows registry. By default, Ion profiles read all the default settings out of the registry from the settings used by the installed version of Windows Internet Explorer. Most of the time, the default settings used by the host browser will work for your applications. However, sometimes you may need to override those settings using custom registry keys.
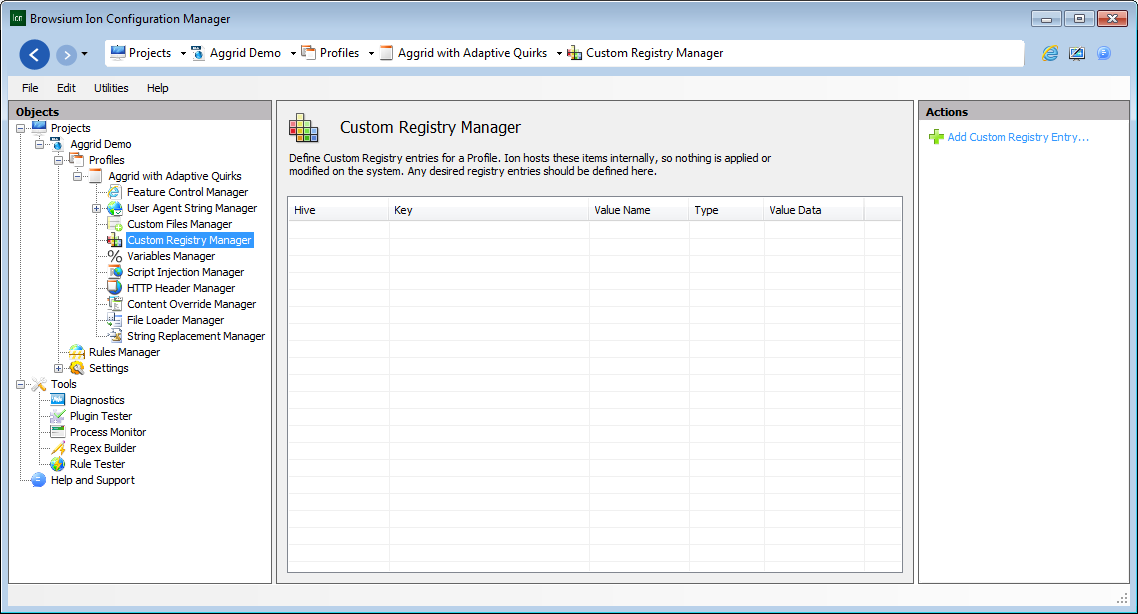
To add or override any default registry setting, choose the ‘Custom Registry Manager’ node under the profile you wish to change, as shown below:
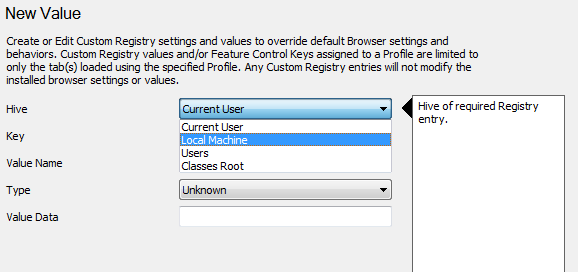
To add a key, click “Add Custom Registry Entry…” from the list of available actions listed in the Actions pane on the right side. This will bring up the Custom Registry Value Editor in Ion.
This UI allows you to specify the Hive, Key, Value, Type and Data for any key in the registry.
You must specify which registry hive the key will live in.
This screenshot shows the available options from the Registry Hive dropdown in the Ion Configuration Manager:
The ‘KEY’ is the node at which the registry key lives. For an example, we want to override the Phishing Filter setting for our application, which is located in the registry at HKLM\SOFTWARE\Microsoft\Internet Explorer\PhishingFilter, as shown in this view of the registry editor:
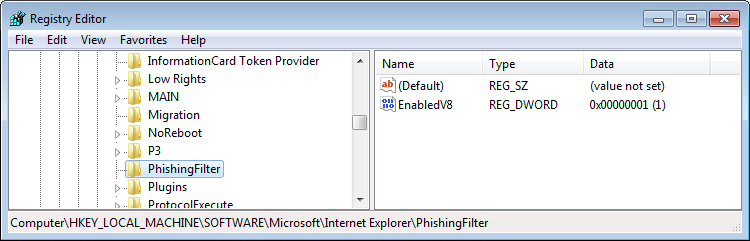
In this case, the HIVE (see above) should be set to “Local Machine” and the “Key should be set to “SOFTWARE\Microsoft\Internet Explorer\PhishingFilter”
In our Phishing Filter example, the VALUE NAME is “EnabledV8”, as shown in the picture above. Enter “EnabledV8” as the Value Name value.
The registry viewer indicates this value is a REG_DWORD. In the Ion Configuration Manager, set the value of TYPE to DWord.
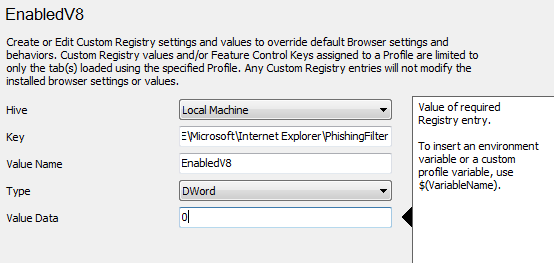
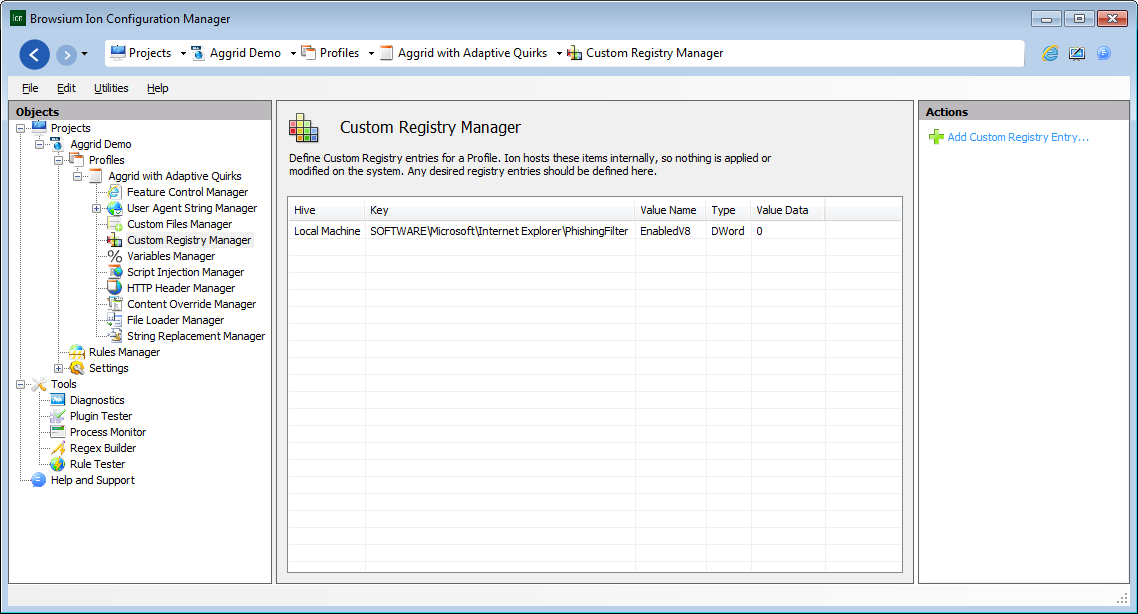
“Value Data” is the value you want to set the key to. In this case, valid values are either 0 (for disabled) or 1 (for enabled). To turn this feature off for this Ion profile, enter ‘0’ in the Value Data field. Your Custom Registry Value editor should look like this:
Hit ‘OK’ to commit your changes. Your new registry override value should appear in the Custom Registry Manager list:
To test your settings, be sure to “Save Local Settings” from the “File” menu. Any number of registry keys may be overridden using this method. To remove a customized registry key from the manager, simply select the key in question and choose “Delete Custom Registry Entry” from the list of Actions available in the Action pane to the right.
Posted in: Ion Knowledge Base,
